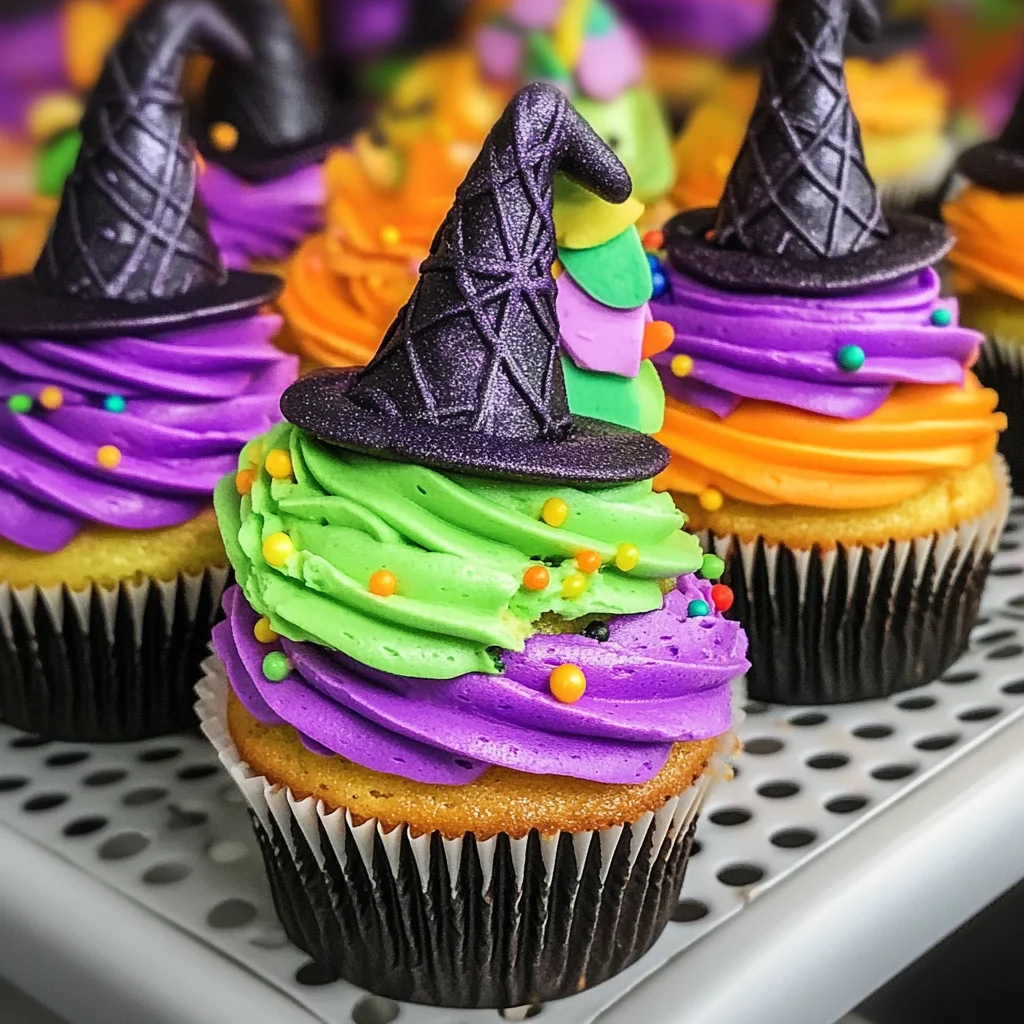
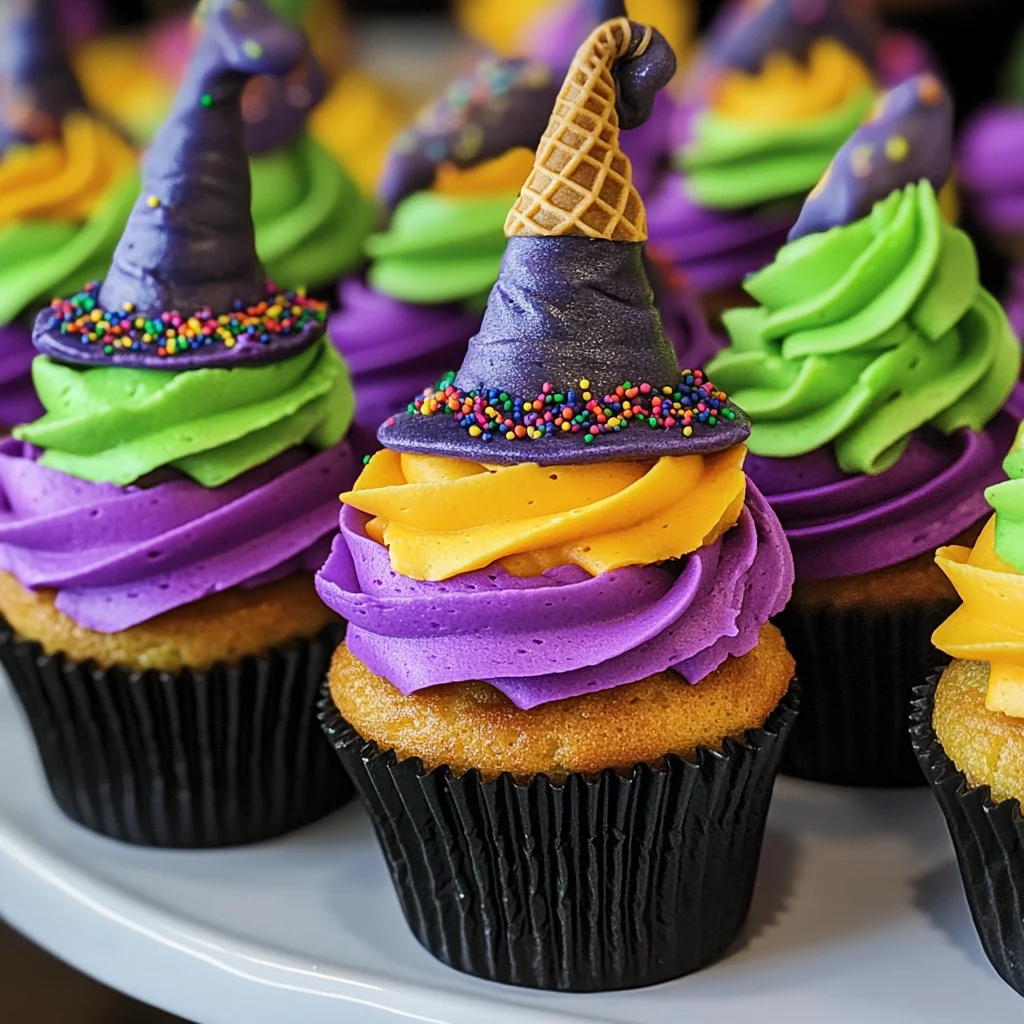
Hocus Pocus Cupcakes
If you’re looking for a fun and festive way to celebrate Halloween, these Hocus Pocus Cupcakes are just what you need! They combine the joy of baking with a sprinkle of creativity, making them a delightful activity for kids and adults alike. Imagine the laughter and excitement as everyone decorates their very own witch hat cupcakes. This recipe is not only perfect for Halloween parties but also great for family gatherings throughout the fall season.
What makes these cupcakes so special is how easy they are to prepare. With just a few simple ingredients, you’ll have a spooky treat that will impress your friends and family. Plus, you can get everyone involved in the decorating process, creating lasting memories in the kitchen!
Why You’ll Love This Recipe
- Easy to Make: With a box cake mix and simple toppings, this recipe comes together quickly.
- Family Fun: Decorating the witch hats is an enjoyable activity for kids of all ages.
- Customizable: Let your imagination run wild with different colors and sprinkles!
- Great for Parties: These cupcakes are sure to be a hit at any Halloween celebration.
- Deliciously Delightful: Each bite is a sweet reminder of the magic of Halloween.
Ingredients You’ll Need
These Hocus Pocus Cupcakes use simple, wholesome ingredients that are easy to find at your local grocery store. Here’s what you’ll need to create these delightful treats:
For the Cupcakes
- favorite box cake mix or homemade recipe (plus ingredients needed for mix)
- 18 waffle cones
For the Frosting and Decoration
- Wilton black food color mist
- Yellow frosting tube
- Purple frosting tube
- Green frosting tube
- White frosting tube
- Desired sprinkles/embellishments
For the Buttercream Frosting
- 1 1/4 cup butter (softened)
- 4 1/2 cups powdered sugar
- 1/4 cup heavy cream
- 1 teaspoon clear vanilla extract
- Purple gel food coloring
- Green gel food coloring
Variations
This recipe is flexible, allowing you to tailor it to your preferences or what you have on hand. Here are some fun ideas to switch things up:
- Change the Cake Flavor: Use chocolate or red velvet cake instead of vanilla for a fun twist!
- Use Different Cones: Try sugar cones or even chocolate-dipped cones for added flavor.
- Mix Up the Colors: Get creative with different frosting colors and themed sprinkles!
- Add Filling: Stuff the cupcakes with your favorite jam or cream filling for an extra surprise.
How to Make Hocus Pocus Cupcakes
Step 1: Bake the Cupcakes
Start by preparing your favorite box cake mix according to package instructions. Pour the batter into cupcake liners and bake until golden brown. This step is crucial because well-baked cupcakes provide a sturdy base for our witch hats!
Step 2: Make the Buttercream Frosting
While the cupcakes cool, it’s time to whip up that delicious buttercream frosting! In a mixing bowl, beat together softened butter and powdered sugar until creamy. Gradually add heavy cream and vanilla extract to reach your desired consistency. This fluffy frosting will hold everything together beautifully!
Step 3: Assemble Your Witch Hats
Once your cupcakes are cool, frost each one generously with buttercream. Take a waffle cone and spray it with black food color mist (this adds that magical touch). Carefully place it on top of each frosted cupcake—voilà! The witch hat is ready.
Step 4: Decorate!
Now comes the best part—decorating! Use various colored frostings and sprinkles to adorn your witch hats however you like. Let your creativity shine! This step allows everyone to express themselves while having fun.
And there you have it—Hocus Pocus Cupcakes that are as delightful as they are delicious! Enjoy making these spooky treats with loved ones this Halloween season.
Pro Tips for Making Hocus Pocus Cupcakes
Creating these whimsical Hocus Pocus Cupcakes will be a delightful experience, especially when you keep these handy tips in mind!
- Choose Quality Cake Mix: If you decide to go with a box cake mix, opt for one that has a high rating. A fluffy and flavorful base is key to making your cupcakes irresistible.
- Perfectly Frosted Hats: Use the frosting tubes for precise decorating. This makes it easier and more fun for kids to create their own unique witch hats without making a mess.
- Mist the Cones Evenly: When using the Wilton black food color mist, hold it 6-8 inches away from the cones for an even coating. This prevents drips and ensures a spooky yet polished look!
- Get Creative with Sprinkles: Don’t hesitate to go wild with sprinkles and other edible decorations! They add an extra layer of fun and excitement, making each cupcake feel like a special treat.
- Chill Before Serving: Allow the finished cupcakes to chill in the fridge for about 30 minutes. This helps the frosting set slightly, making them easier to handle and eat!
How to Serve Hocus Pocus Cupcakes
Presenting your Hocus Pocus Cupcakes can be just as fun as baking them! Consider these ideas to create an enchanting display that will delight your guests.
Garnishes
- Edible Glitter: Sprinkle some edible glitter on top of the frosting for a magical touch that catches the light beautifully.
- Candy Eyes: Place candy eyes on each cupcake to give your witch hats a fun and quirky personality!
Side Dishes
- Witch’s Brew Soup: A vibrant green pea soup can perfectly complement the Halloween theme while providing a warm contrast to your sweet treats.
- Pumpkin Spice Muffins: These muffins bring in seasonal flavors that pair wonderfully with cupcakes, satisfying both savory and sweet cravings.
- Roasted Vegetable Medley: A colorful dish of roasted vegetables adds nutrition and balances out the sweetness of your dessert, creating a well-rounded meal.
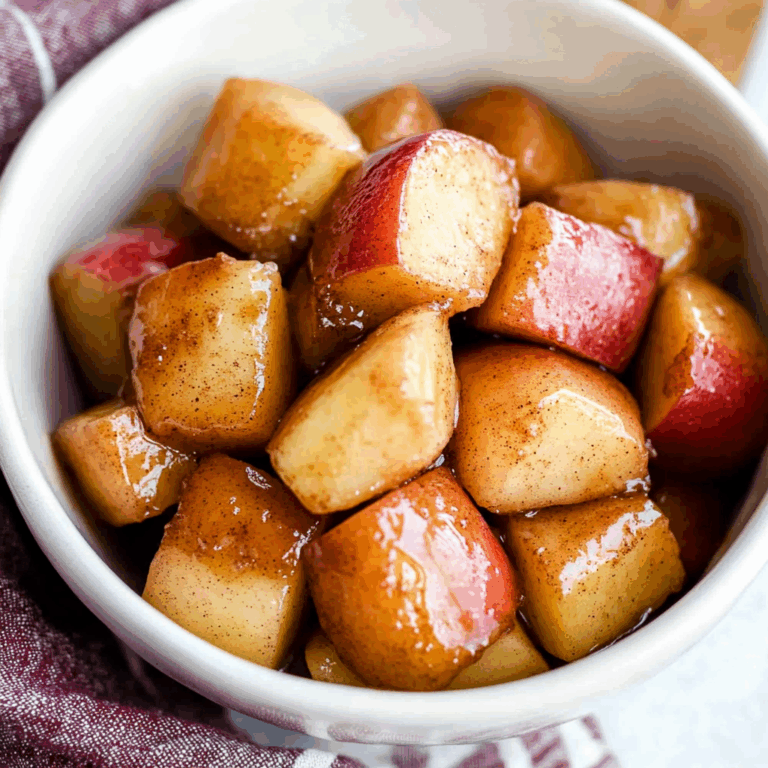
- Crispy Apple Slices with Caramel Dip: This crunchy snack complements the softness of the cupcakes, providing a refreshing contrast that’s perfect for fall gatherings.
With these tips and serving suggestions, your Hocus Pocus Cupcakes will not only taste fantastic but also look spectacular at any Halloween celebration!
Make Ahead and Storage
These Hocus Pocus Cupcakes are not just fun to make; they’re also perfect for meal prep! You can whip them up in advance and store them for later enjoyment, making Halloween celebrations even smoother.
Storing Leftovers
- Allow the cupcakes to cool completely before storing.
- Place them in an airtight container at room temperature for up to 2 days.
- If you need to keep them longer, refrigerate for up to a week.
Freezing
- Freeze the cupcakes without frosting for best results.
- Wrap each cupcake individually in plastic wrap, then place them in a freezer-safe bag.
- They can be frozen for up to 3 months. Thaw overnight in the refrigerator before decorating.
Reheating
- To reheat, allow the frozen cupcakes to thaw completely at room temperature.
- If you prefer warm cupcakes, microwave each one for about 10-15 seconds.
- Add frosting and decorations after reheating.
FAQs
Have questions? Here are some answers that might help!
Can I use any cake mix for Hocus Pocus Cupcakes?
Absolutely! Feel free to choose your favorite box cake mix or stick with a homemade recipe. Both options work wonderfully!
How can I decorate my Hocus Pocus Cupcakes?
Get creative with frosting colors and toppings! Use yellow, purple, and green frosting tubes along with sprinkles to make your cupcakes festive and fun.
How long do Hocus Pocus Cupcakes last?
When stored properly, these delicious treats can last up to 2 days at room temperature or up to a week if refrigerated. Just remember, they’re best enjoyed fresh!
Can I make these cupcakes gluten-free?
Yes! Simply opt for a gluten-free cake mix and ensure all other ingredients are gluten-free as well. You’ll have a delightful treat everyone can enjoy!
Final Thoughts
I hope you have as much fun making these Hocus Pocus Cupcakes as I did! They’re not just treats; they’re an experience perfect for Halloween festivities. Whether you’re baking with kids or surprising friends, these whimsical cupcakes will surely bring smiles. Enjoy every moment of crafting your own magical creations!
Hocus Pocus Cupcakes

Get ready to cast a spell of delight with these enchanting Hocus Pocus Cupcakes! Perfect for Halloween celebrations, these whimsical treats combine the joy of baking with creativity, making them an enjoyable activity for kids and adults alike. Picture the laughter as everyone decorates their own witch hat cupcakes, creating lasting memories in the kitchen. With simple ingredients and an easy-to-follow recipe, you can whip up these delightful desserts that are sure to impress at any spooky gathering.
- Prep Time: 20 minutes
- Cook Time: 20 minutes
- Total Time: 40 minutes
- Yield: Makes approximately 18 servings 1x
- Category: Dessert
- Method: Baking
- Cuisine: American
Ingredients
- favorite box cake mix (plus required ingredients)
- 18 waffle cones
- Wilton black food color mist
- yellow frosting tube
- purple frosting tube
- green frosting tube
- white frosting tube
- desired sprinkles or other embellishments
- 1 1/4 cups softened butter
- 4 1/2 cups powdered sugar
- 1/4 cup heavy cream
- 1 teaspoon clear vanilla extract
Instructions
- Bake your favorite cake mix according to package instructions in cupcake liners and let cool.
- While cooling, prepare the buttercream by beating together softened butter and powdered sugar until creamy. Add heavy cream and vanilla extract to reach desired consistency.
- Generously frost each cooled cupcake with buttercream. Spray waffle cones with black food color mist and place on top of each cupcake.
- Decorate with frosting tubes and sprinkles to personalize your witch hats.
Nutrition
- Serving Size: 1 cupcake (85g)
- Calories: 360
- Sugar: 38g
- Sodium: 380mg
- Fat: 18g
- Saturated Fat: 10g
- Unsaturated Fat: 6g
- Trans Fat: 0g
- Carbohydrates: 49g
- Fiber: 0g
- Protein: 3g
- Cholesterol: 30mg