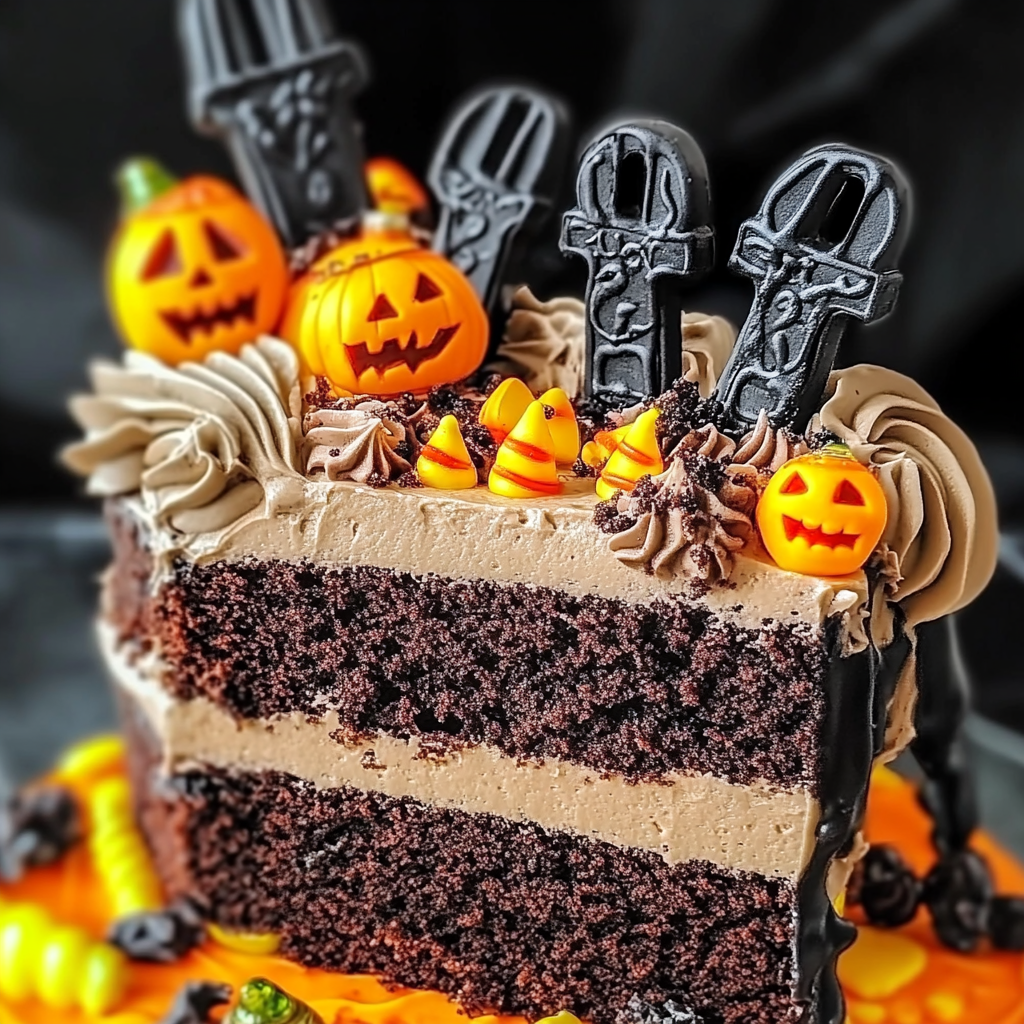
Halloween Graveyard Cake Recipe
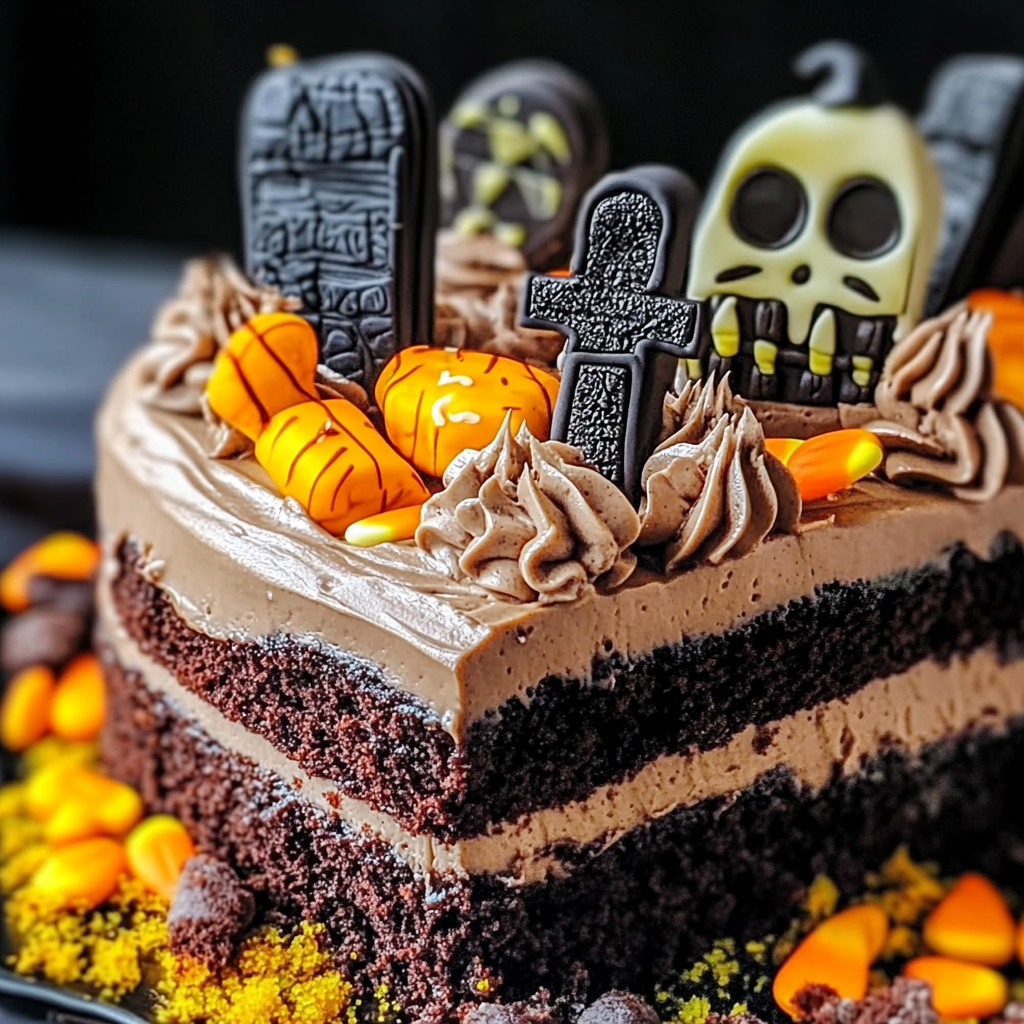
If you’re looking for a fun and spooky dessert that will wow your friends and family this Halloween, you’ve come to the right place! This Halloween Graveyard Cake Recipe is not just a treat for the eyes but also a delight for the taste buds. Imagine a moist chocolate cake filled with creamy vanilla pudding and topped with crunchy Oreo crumbs—all transformed into a graveyard scene! It’s perfect for parties, family gatherings, or even just a cozy night in with your loved ones.
What I love most about this cake is how easy it is to whip up. You can keep it simple or get creative with decorations. Whether you’re celebrating Halloween or just want to indulge in some deliciousness, this cake will surely bring smiles all around.
Why You’ll Love This Recipe
- Super easy to prepare: With just a few simple steps, you can create an impressive dessert without spending hours in the kitchen.
- Family-friendly fun: Kids love getting involved, whether it’s crushing Oreos or decorating the cake. It’s a great way to bond!
- Make-ahead convenience: You can prepare this cake in advance and let it chill in the fridge, making it perfect for busy days.
- Deliciously moist: The combination of chocolate cake and creamy pudding ensures every bite is rich and satisfying.
- Customizable decorations: Get creative! Use different candies or themes to make it uniquely yours.
Ingredients You’ll Need
You’ll be pleased to know that this recipe uses simple, wholesome ingredients that you probably already have on hand. Here’s what you’ll need to create this delightful Halloween Graveyard Cake:
For the Cake
- Chocolate Cake mix
- Ingredients as required on the box
For the Pudding Layer
- 5.1 ounce box vanilla instant pudding
- 2 cups skim milk (for pudding)
- Orange Gel Food coloring
For the Topping
- 15 Oreos (ground into crumbs)
- 12 Milano cookies
- Frosting or Edible Markers
- Pectin-based gummy candies, Candy Corn Pumpkins, Peeps Ghosts (optional)
Variations
One of the best things about this Halloween Graveyard Cake Recipe is its flexibility! You can easily adapt it to suit your tastes or what you have on hand. Here are some fun ideas:
- Switch up the flavors: Instead of chocolate cake mix, try using vanilla or pumpkin flavored cake for a twist!
- Add more layers: Layer in some whipped cream or additional pudding between the cake and Oreo crumbs for extra creaminess.
- Go gluten-free: Use gluten-free cake mix and cookies to make this dessert suitable for everyone.
- Change up the toppings: Use different candies like gummy worms or spooky sprinkles to create your own unique graveyard!
How to Make Halloween Graveyard Cake Recipe
Step 1: Bake the Cake
Prepare your chocolate cake according to package directions and pour it into a 9×13 glass baking dish coated with cooking spray. Baking it until it’s just done will keep it moist and delicious.
Step 2: Poke Holes in Your Cake
Once baked, take it out of the oven and poke holes generously with either the end of a wooden spoon or a straw. This step is essential because those holes allow all that yummy pudding to seep into the cake!
Step 3: Prepare Your Pudding Mixture
While your cake cools slightly, whisk together your vanilla pudding mix with skim milk and add some orange gel food coloring for that festive touch! Make sure to mix until blended but still runny; we want it able to soak into those holes.
Step 4: Pour Pudding Over Cake
Now comes one of my favorite parts—pour that delicious pudding over your poked cake! Gently pat down so that it fills all those lovely holes. Tap your dish a few times on the counter so everything settles nicely.
Step 5: Crush Those Oreos!
Take your Oreos and place them in a large freezer bag. Crush them using a rolling pin or pop them into a food processor until they’re finely crumbled. This will be our spooky “dirt” topping!
Step 6: Chill Out
Cover your creation with plastic wrap and let it set in the refrigerator for at least an hour. This will help all those flavors meld together beautifully.
Step 7: Add Oreo Crumbles
Once chilled, spread those delicious Oreo crumbles over the pudding layer. Remember not to add these too early if you want them crunchy when serving!
Step 8: Create Your Graveyard Scene
Now for the fun part! Use frosting or edible markers to write RIP on Milano cookies as gravestones. Place them gently into your cake along with gummy candies or Peeps ghosts for an extra spooky flair!
Step 9: Enjoy!
After all that hard work (which was really quite easy), dig in! If you’ve tried this recipe, please come back and share how it turned out in the comments—I’d love to hear from you!
Pro Tips for Making Halloween Graveyard Cake Recipe
Creating a spooky yet delightful Halloween Graveyard Cake is a breeze with these helpful tips!
- Use a quality cake mix: The foundation of your cake is crucial; choose a cake mix that you trust for the best flavor and texture.
- Poke enough holes: The more holes you create in the cake, the more pudding it will soak up, resulting in a moist and flavorful dessert. Don’t be shy!
- Chill before serving: Allowing the cake to set in the refrigerator not only enhances the flavors but also helps the pudding meld beautifully with the cake.
- Customize your gravestones: Get creative with your Milano cookies! You can write fun or spooky messages, making each cake slice uniquely festive.
- Don’t rush the garnishing: Wait until just before serving to add Oreo crumbs on top. This keeps them crunchy and adds a delightful texture contrast to each bite.
How to Serve Halloween Graveyard Cake Recipe
Presenting your spooky creation can make all the difference at your Halloween gathering! Here are some ideas to serve this delightful dessert.
Garnishes
- Whipped topping: A dollop of non-dairy whipped topping on each slice adds creaminess and elevates the overall look.
- Chocolate syrup drizzle: A light drizzle of chocolate syrup can enhance both flavor and presentation, mimicking eerie graveyard soil.
- Edible glitter: Sprinkle some edible glitter for an enchanted touch that adds sparkle to your spooky dessert.
Side Dishes
- Ghostly Fruit Salad: Fresh fruits like bananas, apples, and grapes can be transformed into ghostly figures using mini chocolate chips for eyes. It’s a refreshing side that balances out the sweetness of the cake.
- Pumpkin Soup: A warm bowl of pumpkin soup makes for a cozy, seasonal pairing that complements the flavors of fall while being comforting and delicious.
- Savory Cheese Platter: Offering an assortment of cheeses, crackers, and nuts provides guests with savory options that contrast beautifully with dessert.
- Spooky Veggie Tray: Create a creepy vegetable platter featuring veggies cut into fun shapes or arranged to look like a graveyard scene, served with hummus for dipping.
With these tips and serving suggestions, your Halloween Graveyard Cake will be an impressive centerpiece that leaves everyone excited for dessert! Enjoy creating and sharing this fun treat!
Make Ahead and Storage
This Halloween Graveyard Cake recipe is perfect for meal prep, allowing you to enjoy a spooky dessert without the last-minute rush. You can prepare it ahead of time and store it, making it a fantastic option for Halloween parties or gatherings.
Storing Leftovers
- Cover the cake tightly with plastic wrap or aluminum foil to keep it fresh.
- Store in the refrigerator for up to 3 days.
- For best results, add the Oreo topping just before serving to maintain its crunch.
Freezing
- While freezing is not ideal due to the texture of the pudding and cake, you can freeze individual portions.
- Cut the cake into squares and place them in an airtight container.
- Wrap each piece in plastic wrap before placing it in the container.
- Freeze for up to 1 month. Thaw overnight in the refrigerator before serving.
Reheating
- If you prefer your cake slightly warm, remove it from the refrigerator and let it sit at room temperature for about 30 minutes before serving.
- Avoid microwaving as this may alter the texture of both the pudding and cake layers.
FAQs
If you have any questions about making this Halloween Graveyard Cake Recipe, you’re not alone! Here are some common queries:
Can I make this Halloween Graveyard Cake Recipe gluten-free?
Absolutely! Simply use a gluten-free chocolate cake mix instead of regular flour-based mixes. Ensure all other ingredients are also gluten-free.
How long does the Halloween Graveyard Cake Recipe need to chill?
The cake should chill in the refrigerator for at least one hour after adding the pudding. This allows it to set properly and enhances flavor.
What can I use instead of gummy candies for decorations?
You can use other types of candy like chocolate-covered pretzels or even nuts if you’re looking for alternatives that fit your preferences.
Can I substitute skim milk in this Halloween Graveyard Cake Recipe?
Yes! You can use any plant-based milk, such as almond or oat milk, to make it suitable for different dietary needs.
How do I serve this Halloween Graveyard Cake Recipe?
Cut into squares directly from the baking dish. You can add extra decorations like whipped cream or additional candy on top when serving!
Final Thoughts
I hope you find joy in creating this whimsical Halloween Graveyard Cake! It’s not only a delightful treat but also a fantastic way to bring some festive fun to your table. Perfect for parties or just a cozy night in, this dessert will surely impress your family and friends. Enjoy every moment of making it, and don’t forget to share your spooky creations with us! Happy baking!
Halloween Graveyard Cake

Create a spooky yet delicious Halloween Graveyard Cake that will impress your friends and family! This easy-to-make dessert features a moist chocolate cake filled with creamy vanilla pudding, topped with crunchy Oreo crumbs to create a haunting graveyard scene. Perfect for Halloween parties or cozy nights in, this cake is not only visually stunning but also a delightful treat that everyone will love. Get your kids involved in the fun by letting them help with the decorating—it’s a great way to bond while making memories.
- Prep Time: 20 minutes
- Cook Time: 30 minutes
- Total Time: 50 minutes
- Yield: Serves 12 1x
- Category: Dessert
- Method: Baking
- Cuisine: American
Ingredients
- Chocolate cake mix
- 5.1 ounce box vanilla instant pudding
- 2 cups skim milk
- Orange gel food coloring
- 15 Oreos (ground into crumbs)
- 12 Milano cookies
- Pectin-based gummy candies (optional)
- Candy Corn Pumpkins (optional)
- Peeps Ghosts (optional)
Instructions
- Preheat your oven and prepare the chocolate cake mix according to package directions. Pour into a greased 9×13 baking dish.
- Bake until done, then poke holes in the cake using a wooden spoon or straw.
- While cooling, whisk together vanilla pudding mix with skim milk and orange gel food coloring until smooth.
- Pour pudding over the cooled cake, ensuring it seeps into the holes.
- Crush Oreos into crumbs and sprinkle over the pudding layer once chilled.
- Decorate with Milano cookies as gravestones. Optionally add gummy candies for extra flair.
Nutrition
- Serving Size: 1 slice (approximately 90g)
- Calories: 320
- Sugar: 27g
- Sodium: 200mg
- Fat: 14g
- Saturated Fat: 6g
- Unsaturated Fat: 7g
- Trans Fat: 0g
- Carbohydrates: 46g
- Fiber: 1g
- Protein: 4g
- Cholesterol: 15mg