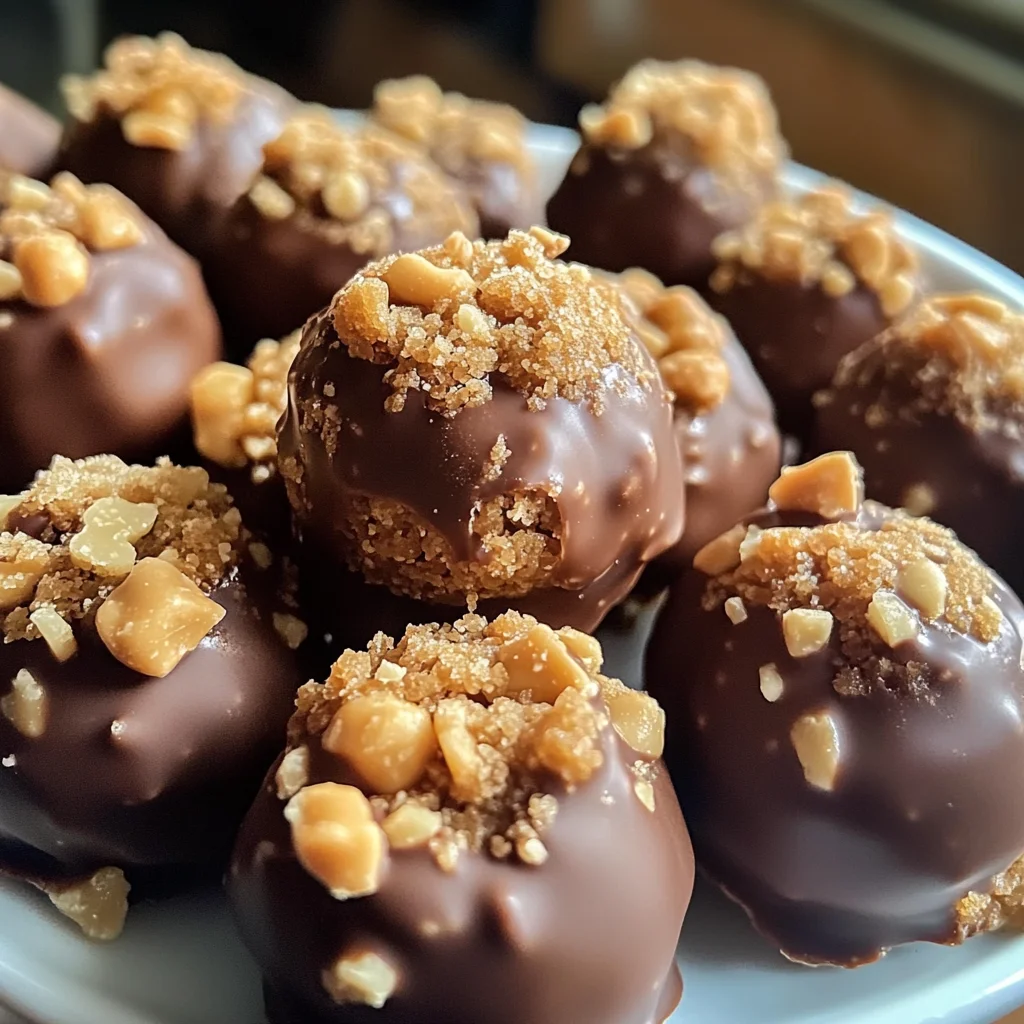
Butterfinger Balls
If you’re looking for a sweet treat that combines nostalgia with a delightful crunch, then these Butterfinger Balls are your answer! There’s something magical about the way creamy peanut butter and crushed Butterfinger bars come together to create a flavor explosion. This recipe is one of my absolute favorites because it’s incredibly easy to whip up, making it perfect for busy weeknights or family gatherings. Trust me; once you serve these at your next get-together, they’ll be gone in a flash!
Not only are these Butterfinger Balls delicious, but they also have that homemade charm that everyone loves. They are a fantastic way to bring smiles and happy memories to any occasion, whether it’s a cozy movie night at home or a festive dessert spread during holiday celebrations.
Why You’ll Love This Recipe
- Quick Preparation: These Butterfinger Balls come together in just 15 minutes of prep time—perfect for when you’re short on time!
- Family-Friendly Delight: Kids and adults alike will love them, making them a hit at any gathering or special occasion.
- Make-Ahead Convenience: You can prepare these treats ahead of time and simply store them in the freezer until you’re ready to enjoy!
- Easy Cleanup: With minimal dishes involved, you can focus more on savoring these delicious bites rather than cleaning up a mess.
Ingredients You’ll Need
Let’s gather some simple and wholesome ingredients that you probably already have in your pantry! These components work together beautifully to create those unforgettable Butterfinger Balls.
For the Base
- 4 tablespoons softened butter (½ stick)
- 1 cup peanut butter (avoid all-natural varieties)
- 1 teaspoon vanilla extract
- 1 cup powdered sugar
- ¾ cup crumbs from graham crackers
- ½ cup Butterfinger bars (crushed)
For the Coating
- 8 ounces chocolate bark or chocolate chips
Optional Garnishes
- Additional crushed Butterfinger bars
- Festive sprinkles
- Coarse sea salt
Variations
One of the best parts about this recipe is its flexibility! Feel free to get creative and customize these Butterfinger Balls to suit your taste preferences.
- Change the Chocolate: Swap out chocolate bark for white or dark chocolate for a different flavor profile.
- Add Nuts: Toss in some chopped nuts for an added crunch and nutty flavor.
- Try Different Candy Bars: Experiment by using crushed candy bars like Reese’s or Snickers instead of Butterfinger!
- Make Them Vegan: Use plant-based butter and dairy-free chocolate chips for a vegan-friendly version.
How to Make Butterfinger Balls
Step 1: Prepare the Dough
In a mixing bowl, combine the peanut butter and softened butter. Using an electric mixer set to medium speed, blend until the mixture is creamy and uniform. This step is crucial because it creates a smooth base that makes rolling into balls much easier!
Step 2: Add Aromatic Notes
Incorporate the vanilla extract into your peanut butter mixture. Blend thoroughly so that every bite has that wonderful vanilla aroma. It adds depth to the flavor profile and elevates your Butterfinger Balls from good to irresistibly delicious!
Step 3: Sweeten the Deal
Gradually add the powdered sugar in increments while blending at low speed. Remember to scrape down the sides of your bowl occasionally. This ensures everything is mixed evenly, leading to perfectly sweetened bites without any clumps.
Step 4: Crunch Time
Gently fold in the graham cracker crumbs and crushed Butterfinger bars. This step introduces delightful texture and flavor throughout each ball. The crunchiness combined with creamy elements makes each bite heavenly!
Step 5: Shape ’em Up
Line a large cookie sheet with parchment paper. Scoop out approximately 1 to 1½ tablespoons of dough, roll them into neat balls, and place them on the cookie sheet. Making sure they’re all similar in size ensures even coating later!
Step 6: Chilling Phase
Freeze those dough balls on the sheet for roughly 30 minutes until they are completely firm. Chilling helps them hold their shape when you coat them in chocolate—trust me; this step is key!
Step 7: Melting the Chocolate
Once your dough balls are chilled, it’s time to melt your chocolate! Use a microwave-safe bowl and heat in 30-second spurts at 50% power, stirring after each interval until melted but still slightly lumpy.
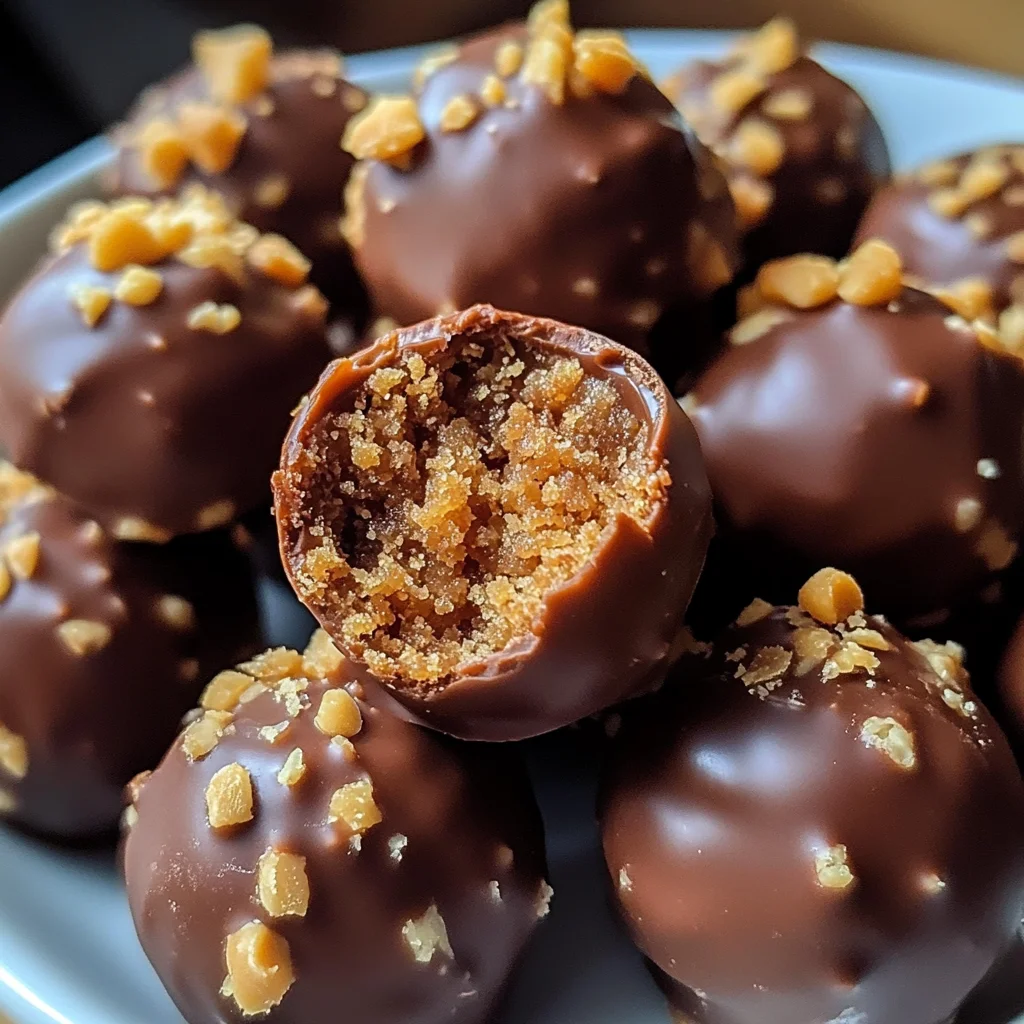
Step 8: Coat and Decorate
Submerge each chilled ball into that luscious melted chocolate! You can fully coat them or leave some of that delightful peanut butter mixture exposed for visual appeal.
Step 9: Finishing Touches
For those extra finishing touches, sprinkle additional crushed Butterfinger bars, festive sprinkles, or flaky sea salt over the top of your coated balls before letting them set.
Step 10: The Grand Finale
Allow the chocolate coating to solidify completely before indulging in your divine Butterfinger Bliss Balls. Once they’re ready, you’ll be amazed by how quickly they disappear!
Pro Tips for Making Butterfinger Balls
Creating the perfect Butterfinger Balls is all about technique and a little love! Here are some tips to ensure your treats turn out delightful every time.
- Use Room Temperature Ingredients: Starting with softened butter and room temperature peanut butter helps achieve a smooth, creamy texture that’s easy to mix. This prevents lumps and ensures better incorporation of the ingredients.
- Don’t Rush the Freezing: Allowing the balls to chill completely before coating them in chocolate is crucial for maintaining their shape. If they’re too soft, they may melt into a gooey mess when dipped.
- Mind Your Chocolate Melting: Melting chocolate requires patience! Heating it slowly in increments helps prevent burning and ensures a silky smooth coating that clings beautifully to your balls.
- Experiment with Coatings: While crushed Butterfinger bars make a great topping, feel free to experiment with other toppings like shredded coconut or chopped nuts. This adds variety and makes each batch unique!
- Keep it Neat: Use a toothpick or fork when dipping the balls into chocolate for a cleaner finish. This minimizes mess and makes it easier to coat each ball evenly.
How to Serve Butterfinger Balls
These Butterfinger Bliss Balls are not just delicious—they’re also visually appealing! Presenting them well can enhance the experience for you and your guests.
Garnishes
- Crushed Butterfinger Bars: A sprinkle on top adds extra crunch and accentuates the flavor.
- Coarse Sea Salt: A light dusting of flaky sea salt creates a delightful sweet-and-salty contrast that elevates every bite.
- Colorful Sprinkles: Festive sprinkles can bring a joyful touch, making these bites perfect for parties or celebrations.
Side Dishes
- Fresh Fruit Platter: A vibrant assortment of seasonal fruits not only adds color but balances the sweetness of the Butterfinger Balls. Think strawberries, blueberries, and sliced kiwi!
- Ice Cream: Pairing these blissful bites with a scoop of vanilla or chocolate ice cream creates an indulgent dessert experience that will impress any crowd.
- Nut Mix: A savory nut mix offers a nice contrast in flavor and texture, providing crunchiness that complements the creamy sweetness of the Butterfinger Balls.
- Coffee or Tea: Serving these treats alongside hot coffee or tea can create a comforting atmosphere, perfect for an afternoon snack or dessert gathering.
With these serving suggestions and pro tips, you’re all set to enjoy your delightful Butterfinger Balls in style! Happy indulging!
Make Ahead and Storage
These Butterfinger Bliss Balls are perfect for meal prep! Not only can you whip them up in advance, but they also store beautifully, making them a convenient sweet treat whenever the craving strikes.
Storing Leftovers
- Store any leftover Butterfinger Balls in an airtight container.
- Keep them at room temperature for up to 3 days, or refrigerate for up to a week.
- If you prefer, you can also place them in the freezer for longer storage.
Freezing
- To freeze, place the shaped and chilled balls on a baking sheet lined with parchment paper.
- Once frozen solid, transfer them to a freezer-safe bag or container.
- They can be kept in the freezer for up to 3 months. Just thaw before enjoying!
Reheating
- These treats are best enjoyed cold, so no need to reheat!
- If desired, let them sit at room temperature for about 10 minutes before serving for optimal texture.
FAQs
Here are some common questions about Butterfinger Balls that may help you!
Can I use different types of chocolate for my Butterfinger Balls?
Absolutely! While chocolate bark or chips are traditional choices, feel free to experiment with dark chocolate or white chocolate for a unique twist.
How do I make Butterfinger Balls without alcohol?
This recipe is already free of alcohol! You can enjoy these delightful Butterfinger Balls knowing they’re suitable for everyone.
How long do Butterfinger Balls last?
When stored properly in an airtight container, your Butterfinger Balls will stay fresh at room temperature for about 3 days or in the refrigerator for up to a week.
What are some ways to customize my Butterfinger Balls?
You can customize your Butterfinger Balls by adding different toppings such as crushed nuts, coconut flakes, or using different flavors of candy bars instead of Butterfingers.
Can I make these Butterfinger Balls vegan-friendly?
To make these treats vegan-friendly, substitute the butter with a plant-based alternative and ensure your chocolate is dairy-free. Enjoy!
Final Thoughts
I hope you find joy in creating these delightful Butterfinger Bliss Balls! They’re not just a treat but a sweet reminder that indulgence can be simple and satisfying. Whether you’re sharing them at gatherings or keeping them all to yourself (no judgment here!), I’m sure everyone will love their creamy and crunchy goodness. Happy cooking!
Butterfinger Balls
Indulge in the delightful world of Butterfinger Balls, a sweet treat that brings together the creamy goodness of peanut butter and the irresistible crunch of crushed Butterfinger bars—all coated in rich chocolate. Perfect for busy weeknights or festive gatherings, these no-bake bites are not just incredibly easy to prepare but also provide a nostalgic flavor that kids and adults alike will love. In just 15 minutes, you can whip up a batch and enjoy their homemade charm. With options to customize your ingredients, these Butterfinger Balls are sure to become a favorite at any celebration!
- Prep Time: 15 minutes
- Cook Time: None
- Total Time: 0 hours
- Yield: Approximately 20 servings 1x
- Category: Dessert
- Method: No-Bake
- Cuisine: American
Ingredients
- 4 tablespoons softened butter
- 1 cup peanut butter
- 1 teaspoon vanilla extract
- 1 cup powdered sugar
- ¾ cup graham cracker crumbs
- ½ cup crushed Butterfinger bars
- 8 ounces chocolate bark or chocolate chips
Instructions
- In a mixing bowl, combine softened butter and peanut butter until creamy.
- Add vanilla extract and mix thoroughly.
- Gradually incorporate powdered sugar until combined, scraping down the sides as needed.
- Fold in graham cracker crumbs and crushed Butterfinger bars for texture.
- Roll mixture into balls (about 1 to 1½ tablespoons each) and place on a parchment-lined cookie sheet.
- Freeze balls for about 30 minutes until firm.
- Melt chocolate in intervals until smooth; coat each ball in melted chocolate.
- Optional: Sprinkle with additional crushed Butterfinger bars or sea salt before letting set.
Nutrition
- Serving Size: 1 ball (30g)
- Calories: 145
- Sugar: 10g
- Sodium: 50mg
- Fat: 9g
- Saturated Fat: 4g
- Unsaturated Fat: 5g
- Trans Fat: 0g
- Carbohydrates: 14g
- Fiber: 0g
- Protein: 3g
- Cholesterol: 5mg